All 100 Gold Skulltulas
Track every token in the standard N64 and 3DS quest, grouped by dungeon and region. The age, time and equipment columns help separate child visits from adult return trips.
How they behave
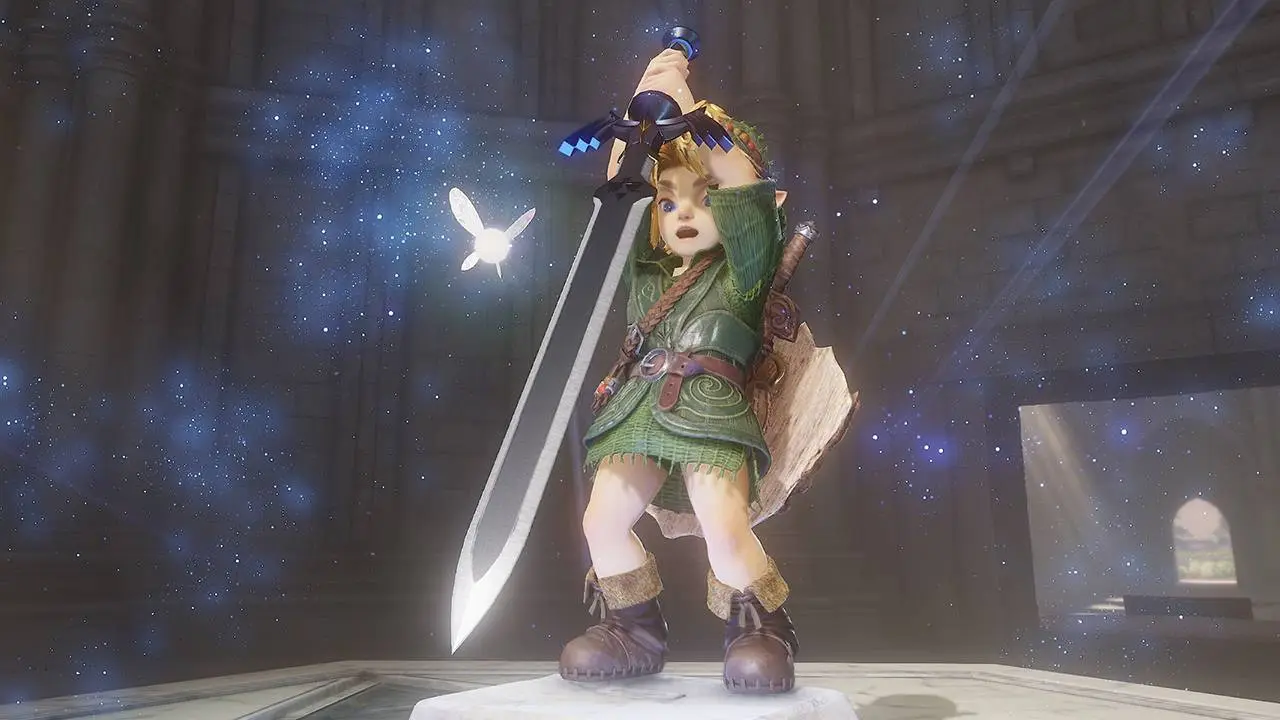
Gold Skulltula tokens accumulate; the House of Skulltula checks your total rather than spending tokens. Visit the cursed family as the count reaches each reward threshold. Use the Boomerang or Hookshot when a token hangs out of reach. Soil patches need bottled bugs and can be checked separately from night-only wall spiders.
Zelda Central and GamesRadar both list all 100 locations. Their numbering differs, so this checklist uses its own dungeon-first numbers. Five outdoor entries disagree about whether night is required; their status cells retain that disagreement. The Water Temple tower’s access description also differs, so its two guide routes remain attributed rather than combined.
| Tokens | Reward | Status |
|---|---|---|
| 10 | Adult’s Wallet (200 rupees) | 3 sources |
| 20 | Stone of Agony; Shard of Agony on 3DS | 3 sources |
| 30 | Giant’s Wallet (500 rupees) | 3 sources |
| 40 | Bombchu | 3 sources |
| 50 | Heart piece | 3 sources |
| 100 | Huge Rupee (200 rupees), repeatable | 3 sources |
All 100 standard-quest locations
Use the region and age columns to group a route. Dungeon tokens follow the standard layout; Master Quest has a different dungeon arrangement. Numbers refer to this page, not an inventory numbering system. For the rows marked “timing differs,” GamesRadar omits a night condition while Zelda Central adds one; no single timing is presented as agreed.
0 of 100 collected
Your checklist saves in this browser. Use the browser’s Print command for a paper copy.
| Collected | # | Region | Location | Age | Time | Equipment | Status |
|---|---|---|---|---|---|---|---|
| 1 | Inside the Deku Tree | Compass-room side recess | Child | Any / interior | Slingshot | 2 location sources | |
| 2 | Inside the Deku Tree | Basement vine ladder | Child | Any / interior | Slingshot | 2 location sources | |
| 3 | Inside the Deku Tree | Basement metal fence | Child | Any / interior | Slingshot | 2 location sources | |
| 4 | Inside the Deku Tree | Bomb-opened larvae-room annex | Child | Any / interior | Bombs, Boomerang and a way to light a fire (a Deku Stick) | 2 location sources | |
| 5 | Dodongo’s Cavern | Baby-Dodongo corridor false wall | Child | Any / interior | Bombs (or a Baby Dodongo explosion) and a Slingshot or Boomerang | 2 location sources | |
| 6 | Dodongo’s Cavern | Bomb-staircase climbing vines | Child | Any / interior | Slingshot or Boomerang | 2 location sources | |
| 7 | Dodongo’s Cavern | Recess above the staircase | Either | Any / interior | Boomerang (as child) or Longshot (as adult) | 2 location sources | |
| 8 | Dodongo’s Cavern | Armos room behind cracked masonry | Child | Any / interior | Bombs | 2 location sources | |
| 9 | Dodongo’s Cavern | Scarecrow shelf in baby corridor | Adult | Any / interior | Hookshot and Scarecrow’s Song | 2 location sources | |
| 10 | Inside Jabu-Jabu’s Belly | Water-switch room vines | Child | Any / interior | Slingshot or Boomerang | 2 location sources | |
| 11 | Inside Jabu-Jabu’s Belly | First token below tentacle pit | Child | Any / interior | Boomerang | 2 location sources | |
| 12 | Inside Jabu-Jabu’s Belly | Second token below tentacle pit | Child | Any / interior | Boomerang | 2 location sources | |
| 13 | Inside Jabu-Jabu’s Belly | Vines before Barinade | Child | Any / interior | Boomerang | 2 location sources | |
| 14 | Forest Temple | Entry room climbing vines | Adult | Any / interior | Hookshot | 2 location sources | |
| 15 | Forest Temple | Lobby wall above courtyard door | Adult | Any / interior | Hookshot | 2 location sources | |
| 16 | Forest Temple | Northeast courtyard chest ledge | Adult | Any / interior | Hookshot | 2 location sources | |
| 17 | Forest Temple | Northwest courtyard high wall | Adult | Any / interior | Hookshot | 2 location sources | |
| 18 | Forest Temple | Rotating basement corridor recess | Adult | Any / interior | Hookshot | 2 location sources | |
| 19 | Bottom of the Well | Central well hidden side chamber | Child | Any / interior | Lens of Truth | 2 location sources | |
| 20 | Bottom of the Well | Locked chamber with Deku Baba | Child | Any / interior | Small Key and Lens of Truth | 2 location sources | |
| 21 | Bottom of the Well | Locked chamber with Like Like | Child | Any / interior | Lens of Truth, Small Key | 2 location sources | |
| 22 | Fire Temple | Lava-room Time Block doorway | Adult | Any / interior | Song of Time, Hookshot | 2 location sources | |
| 23 | Fire Temple | Boulder maze bombable wall | Adult | Any / interior | Bombs, Hookshot | 2 location sources | |
| 24 | Fire Temple | Flying-tiles and Like Like room | Adult | Any / interior | Hookshot | 2 location sources | |
| 25 | Fire Temple | Scarecrow route upper chamber | Adult | Any / interior | Hookshot, Scarecrow’s Song | 2 location sources | |
| 26 | Fire Temple | High chamber near Hammer room | Adult | Any / interior | Hookshot | 2 location sources | |
| 27 | Ice Cavern | Spinning-blade room upper wall | Adult | Any / interior | Hookshot | 2 location sources | |
| 28 | Ice Cavern | Compass-room ice pillar | Adult | Any / interior | Hookshot, Blue Fire | 2 location sources | |
| 29 | Ice Cavern | Ice-block puzzle wall recess | Adult | Any / interior | Hookshot, Blue Fire | 2 location sources | |
| 30 | Water Temple | Whirlpool passage wall | Adult | Any / interior | Iron Boots, Hookshot | 2 location sources | |
| 31 | Water Temple | Inside the central tower | Adult | Any / interior | Longshot, Zelda’s Lullaby, Song of Time | 2 locations; access details differ | |
| 32 | Water Temple | Boulder channel behind waterfall | Adult | Any / interior | Longshot | 2 location sources | |
| 33 | Water Temple | Wall above descending platforms | Adult | Any / interior | Longshot | 2 location sources | |
| 34 | Water Temple | Lowest-floor gated side room | Adult | Any / interior | Hookshot, Spin Attack or Din’s Fire | 2 location sources | |
| 35 | Shadow Temple | Hidden-blade/Like Like side room | Adult | Any / interior | Lens of Truth, Hookshot | 2 location sources | |
| 36 | Shadow Temple | Cell beside descending spikes | Adult | Any / interior | Hookshot | 2 location sources | |
| 37 | Shadow Temple | Behind the single skull pot | Adult | Any / interior | Hookshot | 2 location sources | |
| 38 | Shadow Temple | Scarecrow platform beside boat | Adult | Any / interior | Longshot, Scarecrow’s Song | 2 location sources | |
| 39 | Shadow Temple | Behind the three skull pots | Adult | Any / interior | Hookshot | 2 location sources | |
| 40 | Spirit Temple | Child branch fence across pit | Child | Any / interior | Boomerang or Slingshot | 2 location sources | |
| 41 | Spirit Temple | Wall above child climbing section | Child | Any / interior | Boomerang or Slingshot | 2 location sources | |
| 42 | Spirit Temple | Stairway before child Iron Knuckle | Child | Any / interior | Boomerang or Slingshot | 2 location sources | |
| 43 | Spirit Temple | Boulder room behind Time Block | Adult | Any / interior | Song of Time, Longshot | 2 location sources | |
| 44 | Spirit Temple | Scarecrow perch near giant statue | Adult | Any / interior | Longshot, Scarecrow’s Song | 2 location sources | |
| 45 | Hyrule Field | Cow grotto near Gerudo entrance | Either | Any / interior | Bombs, Din’s Fire or Fire Arrows, Boomerang or Hookshot | 2 location sources | |
| 46 | Hyrule Field | Grotto beside Kakariko approach tree | Either | Any / interior | Bombs, Boomerang or Slingshot ( Hookshot as an adult) | 2 location sources | |
| 47 | Kokiri Forest | Rear of Know-It-All Brothers’ house | Child | Night | at night | 2 location sources | |
| 48 | Kokiri Forest | Soil beside Kokiri shop | Child | Any — bugs in soil | Empty Bottle with bugs | 2 location sources | |
| 49 | Kokiri Forest | Upper rear of Twins’ house | Adult | Night | Hookshot | 2 location sources | |
| 50 | Hyrule Castle / Market / Ganon’s Castle Area | Crates in the Market guardhouse | Child | Any / interior | Sword / basic access | 2 location sources | |
| 51 | Hyrule Castle / Market / Ganon’s Castle Area | First tree inside castle grounds | Child | Any / interior | at night | 2 locations; timing differs | |
| 52 | Hyrule Castle / Market / Ganon’s Castle Area | Storm-opened moat grotto | Child | Any / interior | Ocarina with the Song of Storms, Bombs | 2 location sources | |
| 53 | Hyrule Castle / Market / Ganon’s Castle Area | Arch outside the ruined castle | Adult | Night | Hookshot | 2 location sources | |
| 54 | Lon Lon Ranch | Talon’s upper ranch window | Child | Night | Boomerang or Slingshot | 2 location sources | |
| 55 | Lon Lon Ranch | Tree beside ranch entrance | Child | Any / interior | at night | 2 locations; timing differs | |
| 56 | Lon Lon Ranch | Rear face of corral shed | Child | Night | at night | 2 location sources | |
| 57 | Lon Lon Ranch | Outer ranch wall near silo | Child | Night | Boomerang or Slingshot | 2 location sources | |
| 58 | Kakariko Village | Tree beside village entrance | Child | Night | at night | 2 location sources | |
| 59 | Kakariko Village | Unfinished building’s outer wall | Child | Night | at night | 2 location sources | |
| 60 | Kakariko Village | House beside mountain-trail gate | Child | Night | at night | 2 location sources | |
| 61 | Kakariko Village | Village watchtower ladder | Child | Night | Slingshot or Boomerang | 2 location sources | |
| 62 | Kakariko Village | Outside the cursed family’s house | Child | Night | at night | 2 location sources | |
| 63 | Kakariko Village | High wall above Impa’s roof | Adult | Night | Longshot | 2 location sources | |
| 64 | Kakariko Graveyard | Graveyard southeast wall | Child | Night | Boomerang | 2 location sources | |
| 65 | Kakariko Graveyard | Soil near Royal Family tomb | Child | Any — bugs in soil | Bottled bugs | 2 location sources | |
| 66 | Lost Woods | Lost Woods left-left soil patch | Child | Any — bugs in soil | Bottled bugs | 2 location sources | |
| 67 | Lost Woods | Forest Stage clearing soil | Child | Any — bugs in soil | Bottled bugs | 2 location sources | |
| 68 | Lost Woods | Forest Stage bean platform | Adult | Night | Magic Bean planted as Child, Hookshot | 2 location sources | |
| 69 | Lost Woods | Sacred Forest Meadow high wall | Adult | Night | Hookshot | 2 location sources | |
| 70 | Death Mountain Trail | Bombable trail wall recess | Either | Any / interior | Bombs | 2 location sources | |
| 71 | Death Mountain Trail | Soil beside Dodongo’s Cavern | Child | Any — bugs in soil | Bottled bugs | 2 location sources | |
| 72 | Death Mountain Trail | Red rock above cavern entrance | Adult | Night | Megaton Hammer | 2 location sources | |
| 73 | Death Mountain Trail | Red rocks on summit approach | Adult | Night | Megaton Hammer | 2 location sources | |
| 74 | Death Mountain Crater | Crate at crater’s summit entrance | Child | Any / interior | Sword / basic access | 2 location sources | |
| 75 | Death Mountain Crater | Soil beside crater warp pad | Child | Any — bugs in soil | Bolero of Fire, bottled bugs | 2 location sources | |
| 76 | Goron City | Crate in Goron City rock room | Child | Any / interior | Bombs or Bomb Flowers | 2 location sources | |
| 77 | Goron City | Rear of central hanging platform | Adult | Any / interior | Hookshot | 2 location sources | |
| 78 | Zora’s River | First tree along river route | Child | Any / interior | at night | 2 locations; timing differs | |
| 79 | Zora’s River | Ladder below Domain waterfall | Child | Night | at night | 2 location sources | |
| 80 | Zora’s River | High cliff near river bridge | Adult | Night | Longshot, or Hookshot from the fence | 2 location sources | |
| 81 | Zora’s River | High ledge on river bean route | Adult | Night | Magic Bean planted as Child, Longshot | 2 location sources | |
| 82 | Zora’s Domain | Wall beneath frozen diving ledge | Adult | Night | Hookshot or Longshot | 2 location sources | |
| 83 | Zora’s Fountain | Lone fountain tree | Child | Any / interior | at night | 2 locations; timing differs | |
| 84 | Zora’s Fountain | Fountain wall beside fallen log | Child | Night | Slingshot, Boomerang | 2 location sources | |
| 85 | Zora’s Fountain | Heavy-rock passage behind fountain | Adult | Any / interior | Silver Gauntlets, Hookshot | 2 location sources | |
| 86 | Lake Hylia | Pillar on Fire Arrow island | Child | Night | at night | 2 location sources | |
| 87 | Lake Hylia | Laboratory rear outside wall | Child | Night | Boomerang | 2 location sources | |
| 88 | Lake Hylia | Soil beside lakeside laboratory | Child | Any — bugs in soil | Bottled bugs | 2 location sources | |
| 89 | Lake Hylia | Crate at laboratory pool bottom | Adult | Any / interior | Iron Boots, Hookshot | 2 location sources | |
| 90 | Lake Hylia | Top of the lake’s dead tree | Adult | Night | Longshot | 2 location sources | |
| 91 | Gerudo Valley | Cliff beside small valley bridge | Child | Night | Slingshot, Boomerang | 2 location sources | |
| 92 | Gerudo Valley | Soil on canyon’s lower ledge | Child | Any — bugs in soil | Cucco, Bottled bugs | 2 location sources | |
| 93 | Gerudo Valley | Wall behind carpenters’ tent | Adult | Night | Hookshot | 2 location sources | |
| 94 | Gerudo Valley | Stone arch beside carpenters’ tent | Adult | Night | Hookshot | 2 location sources | |
| 95 | Gerudo Fortress | Fortress exterior eastern wall | Adult | Night | Hookshot or Longshot | 2 location sources | |
| 96 | Gerudo Fortress | Large target at archery range | Adult | Night | Gerudo Membership Card, Hookshot or Longshot | 2 location sources | |
| 97 | Haunted Wasteland | Lower chamber of desert guide tower | Adult | Any / interior | Lens of Truth, Longshot | 2 locations; timing differs | |
| 98 | Desert Colossus | Palm beside the desert oasis | Adult | Night | Hookshot | 2 location sources | |
| 99 | Desert Colossus | Soil outside Spirit Temple | Child | Any — bugs in soil | Bottled bugs | 2 location sources | |
| 100 | Desert Colossus | Rock reached from desert bean plant | Adult | Night | Magic Bean planted as Child, Hookshot | 2 location sources |
Questions
Are tokens consumed when I claim a reward?
No. The reward ladder uses the total number collected. Claiming a wallet does not subtract tokens.
Are all overworld tokens night-only?
No. Soil patches, crates and hidden interiors differ from wall spiders. Follow the time column, and note the five source disagreements.
Related
Sources
- Zelda Wiki — Gold Skulltula — checked 2026-11-05
- Zelda Wiki — House of Skulltula — checked 2026-11-05
- Nintendo Everything — attack change — checked 2026-11-05
- Zelda Central — 100 Gold Skulltulas — checked 2026-11-05
- GamesRadar — complete Gold Skulltula guide — checked 2026-11-05
Last checked 2026-11-05.